This page is a collection of my thoughts on the micro:bit. However...
I have no affiliation with the BBC, Microsoft, or any of the partners involved in making the micro:bit
It also contains a variety of programs I've written for it, which may help in your classroom. All are FREE and include:
The BBC has unveiled the BBC micro:bit, a pocket-sized codeable computer with motion detection, a built-in compass and Bluetooth technology, which is to be given free to every child in year 7 or equivalent across the UK.
A collaboration between 29 partners, the micro:bit is the BBC's most ambitious education initiative in 30 years, with an ambition to inspire digital creativity and develop a new generation of tech pioneers.
For those that don't know me, and haven't seen the rest of marquisdegeek.com, I'm an edTech CTO and general-purpose computer geek! My career has lasted 22 years (touch wood!) and given me the opportunity to work on more languages and platforms than I care to remember. The only important thing I need to reminder you regarding my involvement with the micro:bit is this:
I have no affiliation with the BBC, Microsoft, or any of the partners involved in making the micro:bit
And because I have no pay masters, I can say what I like about it!
During it's development I was hopeful for the device, but my first impressions were poor. And, in many ways, they failed to live up to even these expectations.
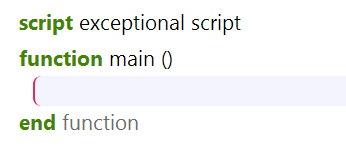
When the micro:bit is switched on it executes the program instructions in the main function. And nothing else. When you start the editor you see this:
The micro:bit will start at the first instruction and continue to the end. This makes it very difficult to create animations, since the program needs to keep running in order to keep changing the animation frame.
The most common solution to this program is to force the main function to never end. You can do this by letting it 'spin' in a loop forever. This can be done through the forever code, or a simple while loop that continues to execute while the value of the expression ('true' in this case) is 'true'. Since true is always true, the loop runs forever and you can ask the micro:bit to work indefinitely. That code looks like this:
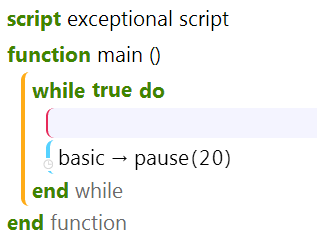
The reason for the delay is that the micro:bit runs so fast that without a pause any lights that blink would happen very fast, and could even cause epiletic fits in some users.
NOTE: If you have registered an event (like 'on button pressed') then its code will still get executed when you pressed the given button. More on events at a later date...
The solo main approach differs from other platforms. So if your students have experienced the Arduino they will be used to two functions: setup and loop. You can mimic this approach for them by creating two functions (called setup and loop) and making main appear thus:

But, to be fair, if your students are confident with the Arduino, they'll probably be teaching you how to convert it!
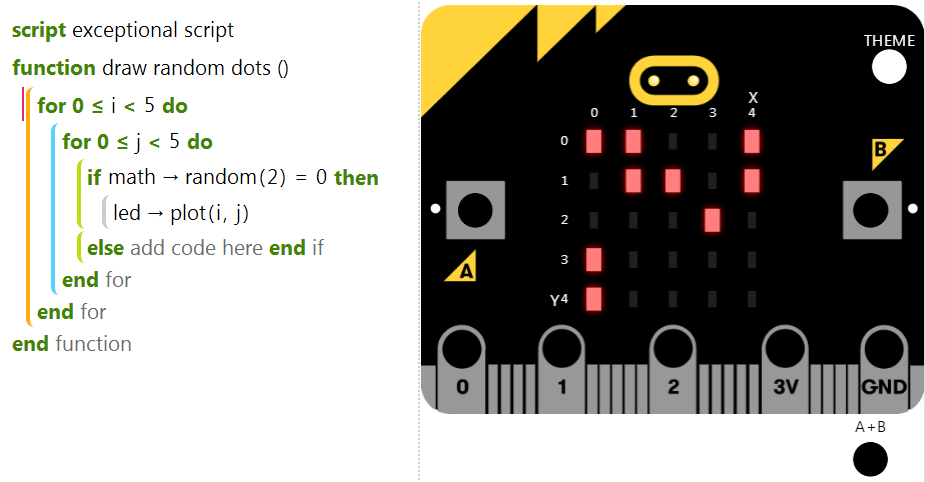
Our first example is to create simple random pattern of lights. We will put this in a function on its own because we are going to use this code again, and it's good practice to isoalte commonly (and often)-used code in a function so it can be used time and time again.
You can download the hex as randomdots.hex
Notes: The random function is in-built, and returns a random value between 0 and 1. i.e. 2-1.
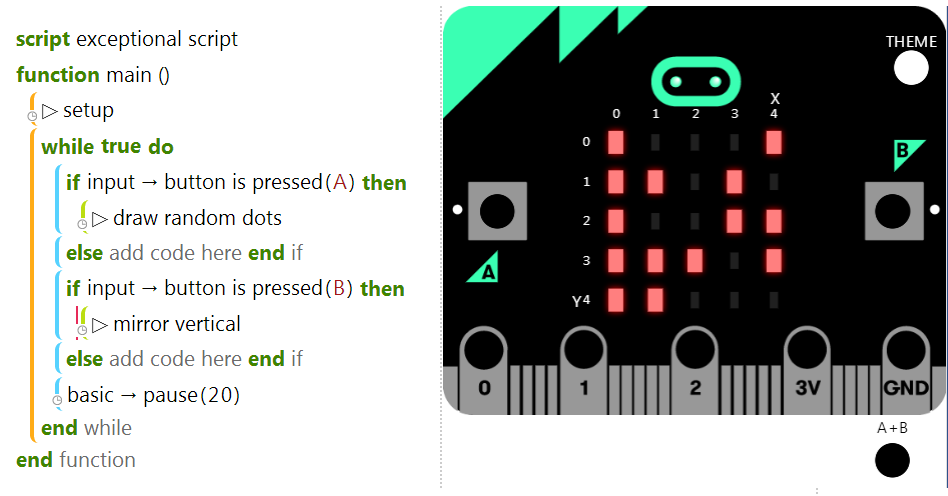
You can then return to the main function and draw a new screen of random dots whenever the 'A' button is pressed. If you'd like
a hint, the basic code is: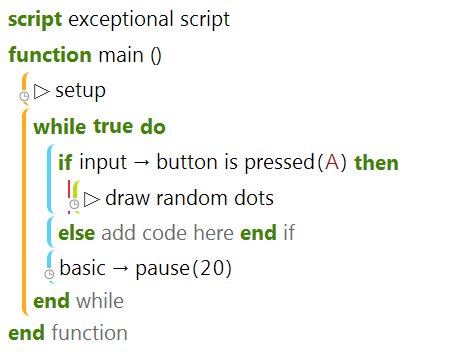
You will notice that after a few presses the whole area is lit. That is because we never un-light anything. There are two solutions here:
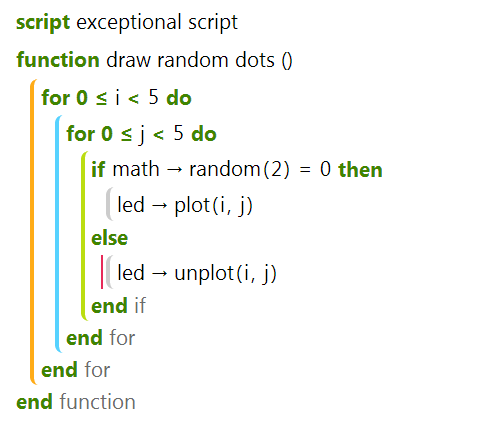
NOTE: The 'for' loops here repeat the inner code for all values of 0, 1, 2, 3, and 4. It is normal in programming to start counting from 0 and use < 5, rather than <=4 as it gives a clue as to how many items there are. In this case, 5. However, it is not normal to force the name of for loop counter. i and j don't make a lot of sense in this instance, since we're working through X and Y co-ordinates. Alas, I have not found a way to change this.
You can download the hex as randomdots3.hex
Other ideas include:
Begin with the random dots example, and add a trigger so that the 'B' button calls a function called mirror
Then, write a new function which reads the state of each led, and produces a mirror image on the other half of the display. Remember to turn mirrordots LEDs both on, and off, as required.
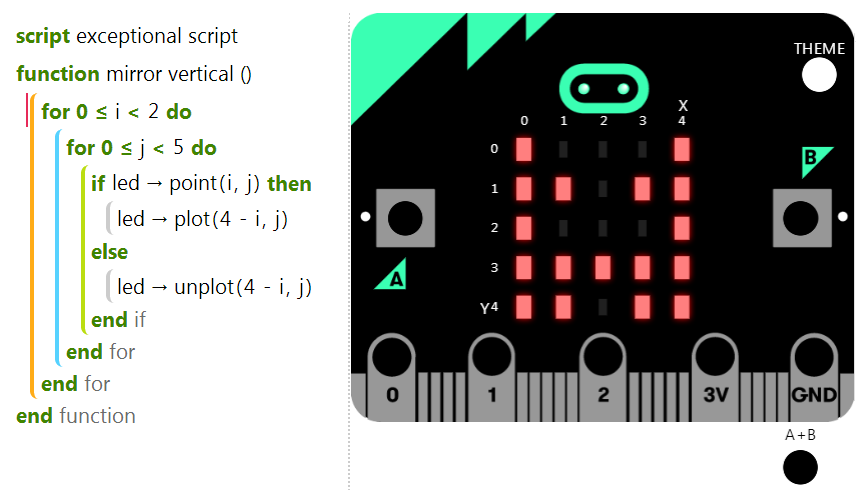
You can download the hex as mirrordots.hex
Other ideas include:
In short, don't bother! It appears the micro:bit requires you to re-configure the compass every time you upload a new program to it. This takes time, and causes anyone to lose interest!
In short, don't bother! The temperature is detected by examing the ambient temperature of the circuit board. In doing so the temperature as reporting increases, or decreases, incrementally by 1 degree at a time. Consequently, all attempts at measuring a hot thing (coffee) compared to a cold thing (metal desk) took several minutes to reach a temperature different enough that it could be used.
Touch Develop API documentation
Tech Will Save Us ideas for additional hardware
 Marquis de Geek